Fire Safety and Utility Controls
Three elements, one chemical reaction. CERT Unit 6 starts with the fire triangle (heat, fuel, oxygen, the three that must combine to burn) because every firefighting decision follows from it: remove one leg and the fire dies. The unit then walks through fire classes, the P.A.S.S. extinguisher drill, the size-up questions that decide whether to fight at all, and the utility hazards (gas, carbon monoxide, electricity) that kill rescuers who skipped the basics. This post distills Unit 6.
Disclaimer: The information provided in this article is for general informational and educational purposes only. It is not professional firefighting or engineering advice. Fire suppression by untrained persons is dangerous. Take a hands-on extinguisher course and follow your fire department’s instructions.
The Readiness Audit
Could you size up a kitchen fire and use an extinguisher correctly in 30 seconds?
- Green: You have an ABC extinguisher, know P.A.S.S., and know your gas and electric shutoffs cold.
- Yellow: You own an extinguisher but have never tested or trained with one.
- Red: You would throw water on a grease fire.
If you are Yellow or Red, execute Phase 1 immediately.
Phase 1: Fire Chemistry and Classes
Goal: Learn what burns and how to name it.
The three elements of the fire triangle create a chemical exothermic reaction, which is fire. Fires are categorized into classes by fuel type: Class A fires burn ordinary combustibles such as paper, cloth, wood, rubber, and many plastics. Class B fires burn flammable liquids including oils and gasoline plus combustible liquids like charcoal lighter fluid and kerosene, and only the vapor burns when ignited. Class C fires involve energized electrical equipment such as wires and motors. The class decides the extinguisher, because using the wrong agent on the wrong class can spread the fire or electrocute the operator.
The Takeaway: Identify the fuel before you reach for anything. The triangle also hands you the defeat strategy: cool it, smother it, or starve it.
Phase 2: Size-Up and Suppression Safety
Goal: Learn when to fight and how to stay alive doing it.
Size-up dictates whether to attempt fire suppression and helps you plan it, and the safety of individual CERT volunteers is always the top priority. The manual’s non-negotiables: use the buddy system, because buddies protect your safety and you never fight a fire alone. Wear safety equipment (gloves, helmet, goggles, N95 mask, sturdy shoes or boots), noting that this equipment is generally not fire-resistant PPE. Have a backup team whenever possible to support the effort and help if needed. Always have two ways to exit the fire area, since fires spread much faster than you might think. And look at the door before entering.
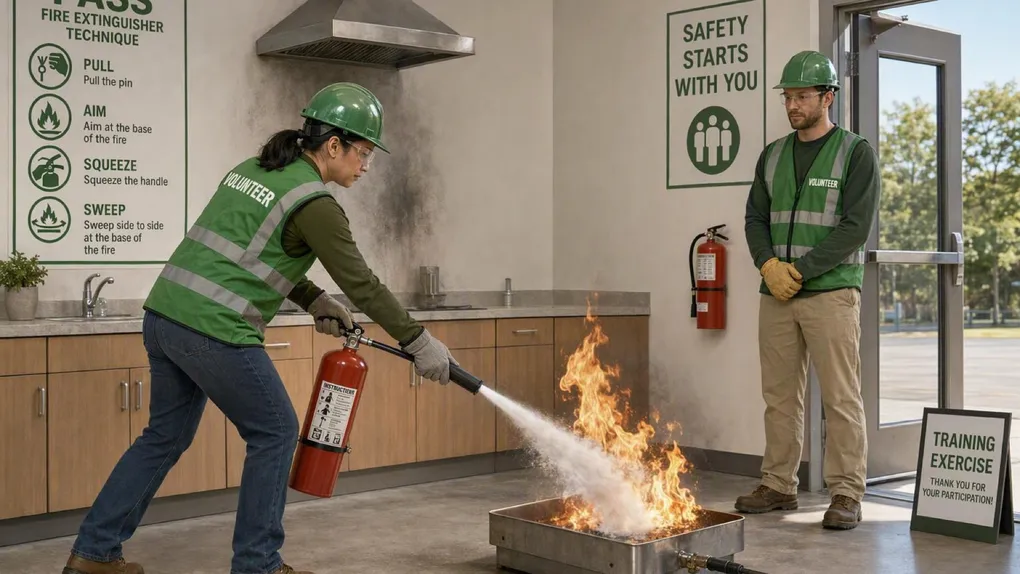
The extinguisher drill is P.A.S.S.: Pull (and test the extinguisher after pulling the pin), Aim, Squeeze, and Sweep. Aim at the base of the fire, because it is important to extinguish the fuel, not the flames. Test the extinguisher before approaching any fire, and used extinguishers must be recharged or replaced.
The Takeaway: The size-up question is not “can I put this out,” it is “can my buddy and I put this out with two ways out and a backup team.” Any no answer means evacuate and let the professionals work.
Phase 3: Utility Hazards
Goal: Master the invisible killers.
Natural gas presents two hazards: it is an asphyxiant that displaces oxygen, and it is flammable under the right conditions. It is lighter than air and you will likely not be able to feel a leak, so place natural gas detectors like smoke alarms, strategically on every level of the home near the furnace, hot water tank, and other gas appliances such as the clothes dryer or stove, and test them monthly. Carbon monoxide is a deadly, colorless, odorless, poisonous gas, also lighter than air, produced by incomplete burning of fuels including natural gas. Electrical hazards round out the set: know your main breaker and what it feeds, and never touch electrical equipment while wet or standing in water.
The Takeaway: Gas and CO defeat your nose. Detectors are the only sense that works, and the shutoff wrench taped to the meter is what turns a leak from a neighborhood event into an incident report.
The Essential Kit Checklist
- The ABC Extinguisher: Small canister in the kitchen, tested, and everyone old enough knows P.A.S.S.
- The Detectors: Natural gas and CO detectors on every level, tested monthly, placed near gas appliances.
- The Shutoff Tools: Wrench and pliers staged at the gas and water shutoffs, practiced in the dark.
- The PPE: Gloves, helmet, goggles, N95 mask, and sturdy boots staged together for response.
- The Two Exits: Every room’s second exit walked by every family member.
Scenario Planner (Contingencies)
“The fire is small, I will handle it alone.” The trap: fires spread faster than you think, and the manual forbids fighting one alone for good reason. The fix: buddy, backup team, two exits, or no attack. The extinguisher exists for small fires caught early, not for heroics.
“I smell gas, I will flip the lights to look around.” The trap: a spark inside the gas cloud. The fix: natural gas is lighter than air and flammable, so leave, shut gas at the meter with the wrench staged there, and call from outside.
Next Steps
- Re-run the Readiness Audit. Scroll back to the top, answer the three questions honestly, and close whichever gap they reveal before you close this tab.
- Print the checklist. The kit list above only works if it exists when the power is out, so paper beats apps here.
- Fold it into the family plan. A prepared household beats prepared person, so put these steps in front of everyone who shares your roof.
Next: Read Light Search and Rescue for Unit 7’s size-up, cribbing, and survivor extraction.
Adapted from FEMA - CERT Basic Training (public domain). Read the original: CERT Basic Training Participant Manual (2019).