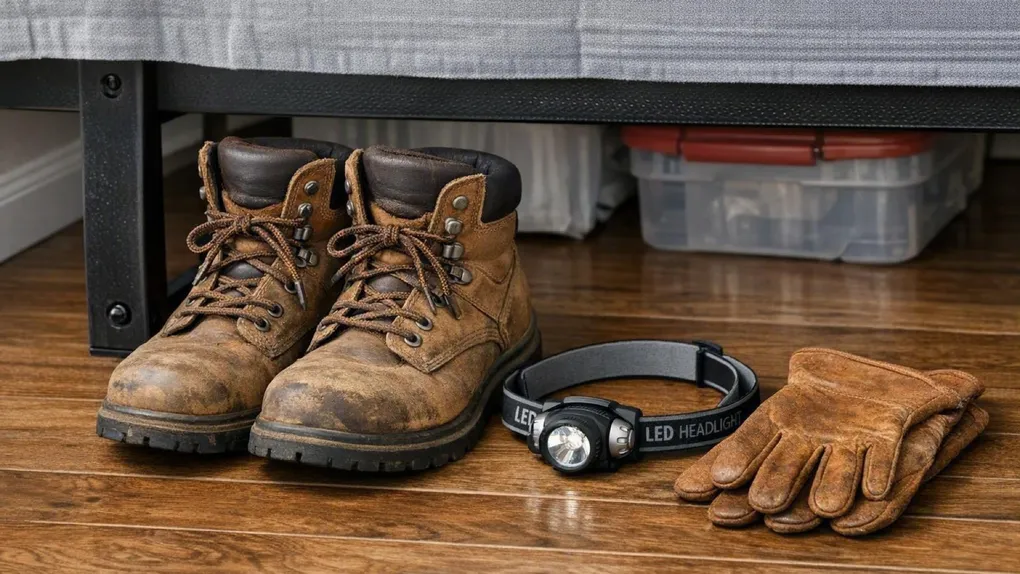
Prepping for an earthquake (Part 3): The under-bed kit
The paramedic who responded to the 3 a.m. shaker saw the same injury over and over, and it was not from the quake. It was a sliced heel. People woke up, the shaking stopped, and they stepped out of bed barefoot into a floor they could not see, covered in glass they could not hear falling. One cut changed everything: no walking to check the kids, no walking to the gas valve, just a bleeding adult alone in the dark. The earthquake injured them once. The floor almost finished the job.
Imagine it is 3:00 AM. A 7.0 magnitude earthquake strikes. The violence of the shaking knocks power lines down, plunging your home into absolute darkness. Pictures shatter, windows break, and books fly off shelves. When the shaking finally stops, your floor is no longer a carpet, it is a minefield of jagged glass and debris.
Caution: Mobility is survival. If you step out of bed barefoot and slash your foot on a shard of glass, you become an immediate casualty. You cannot walk to check on your children. You cannot walk to shut off the gas. You are bleeding, immobile, and blind in the dark. The “Under-Bed Kit” is a low-tech solution to a high-stakes problem. By securing three simple items to your bed frame, you ensure that when you stand up, you are armored, illuminated, and ready to lead your family to safety. This is Part 3 of the earthquake series.
Disclaimer: The information provided in this article is for general informational and educational purposes only. It is not intended as, and should not be considered, professional or emergency-response advice.
The Readiness Audit
If the lights went out and the floor was covered in glass right now, could you get out of your bedroom safely?
- Green: You have a bag tied to your bed frame containing sturdy shoes, a headlamp, and leather gloves.
- Yellow: You keep slippers and a phone next to the bed, but they aren’t secured (they will bounce away during a quake).
- Red: You sleep barefoot and rely on the streetlights coming through the window.
If you are Yellow or Red, execute Phase 1 today.
Phase 1: The Physics of Chaos (Why Tie It Down?)
Goal: Ensure your gear is where you need it, not across the room.
The “Migration” Problem
During a violent earthquake, gravity seems to malfunction. Objects “migrate.”
- Your nightstand may tip over or slide four feet away.
- Shoes left loosely on the floor can bounce across the room or get buried under falling plaster/books.
- The rule: if it isn’t tethered, it isn’t there.
The fix: you need a canvas tote bag, a drawstring gym bag, or even a sturdy plastic grocery bag. Tie the handle of this bag directly to the leg of your bed frame (near the headboard). This ensures that no matter how violently the room shakes, your gear is exactly within arm’s reach.
The Takeaway: The quake relocates everything that is not tied down, so the kit lives on a tether an arm’s length from your pillow.
Phase 2: The Inventory (What Goes Inside?)
Goal: Arm yourself for a hostile environment.
1. Foot Protection (The Priority)
- The item: sturdy slip-on shoes, old sneakers, or work boots.
- The trap: do not use slippers. They lack the hard soles needed to stop a nail or a large shard of glass.
- The trick: stuff a pair of socks inside the shoes. This keeps the shoes from crushing and ensures you have socks if you are barefoot.
2. Illumination (Hands-Free)
- The item: a headlamp is superior to a flashlight.
- The why: you need both hands to crawl, move debris, carry children, or turn off gas valves.
- The backup: spare batteries taped to the headlamp.
- The prohibition: never use matches or a lighter. Gas leaks are common after quakes. One spark can blow up the house.
3. Hand Protection
- The item: a pair of leather work gloves.
- The why: you may need to move broken timber, glass, or metal to exit the room or rescue a family member.
4. Signaling
- The item: a high-decibel whistle.
- The why: if you are trapped or need to signal family members in a loud, chaotic house, a whistle saves your voice and cuts through the noise.
The Takeaway: Shoes with socks, a headlamp with taped spares, leather gloves, and a whistle: the four items that turn a barefoot casualty into the family’s rescuer.
Phase 3: The “Wake Up” Drill (The Protocol)
Goal: Execute the plan without thinking.
When the shaking stops, do not jump out of bed. Follow this sequence:
- Wait: ensure the shaking has truly stopped and debris has settled.
- Reach: reach down and grab the bag tied to the bed leg.
- Gear up in bed:
- put the headlamp on your head. Turn it on
- put the socks and shoes on while sitting on the bed. Do not put your feet on the floor until they are shod
- put the leather gloves on (or in your pocket)
- Scan: use your light to sweep the floor for hazards.
- Move: carefully exit the room to check on others and assess utilities.
The Takeaway: The drill is five verbs, wait, reach, gear, scan, move, and its whole purpose is that your first bare foot never touches the floor.
The Essential Kit Checklist
- The bag: a tote or drawstring bag tied to every bed frame in the house.
- The shoes: sturdy slip-ons with socks stuffed inside.
- The light: a headlamp with spare batteries taped to the strap.
- The hands: leather work gloves.
- The signal: a high-decibel whistle.
Scenario Planner (Contingencies)
“My spouse sleeps through everything.” The trap: assuming both adults will wake and gear up independently. The fix: the second bag, one kit tied to each side of the bed, plus a standing agreement that whoever is awake first calls out and passes gear down the hallway, bedroom by bedroom.
“The kids’ rooms are down the hall.” The trap: running to them barefoot in the dark. The fix: the parent kit rule, adults gear up first (shoes on, headlamp on) before leaving their own room, because an injured parent cannot help a frightened child, and the child who is told to wait with a pillow over their head is safe until a shod adult arrives.
Next Steps
- Build the first under-bed kit tonight. A bag, shoes with socks inside, a headlamp, gloves, a whistle, and a knot to the bed leg. Ten minutes total.
- Teach the wake-up drill out loud to the whole household: wait, reach, gear, scan, move.
- Read Part 4: The kill switch next, because once you can walk, the next move is stopping the gas, the water, and the electricity from finishing what the quake started.
Originally adapted from public FEMA and USGS earthquake guidance (public domain).