Prepping for a drought checklist
Over the last seven articles, we have dissected the threat of drought, from the silent leaks that drain your wallet to the structural soil shifts that can crack your foundation. We have moved from the behavioral discipline of the Navy shower to the engineering of greywater systems. But knowledge alone does not fill the reservoir.
Drought is unique among disasters because it is a slow-motion crisis. It gives you ample time to prepare, yet it punishes procrastination with rising costs and water rationing. In a severe scarcity event, the difference between a vibrant, safe home and a withered fire hazard is simply action.
The checklist post is the one I print. The series explains the why, this page is the do. It consolidates the entire drought series into a single linear protocol, ordered the way the work actually flows: stop the leaks first, then the habits, then the landscape, then the harvest, then the reserve, then the fire defense, then the ground under your feet.
Drought is a slow-motion crisis. It gives you ample time to prepare, yet it punishes procrastination with rising costs and water rationing. In a severe scarcity event, the difference between a vibrant, safe home and a withered fire hazard is simply action. This master checklist is your external brain: print it, tape it inside a cabinet, and work it line by line.
Disclaimer: The information provided in this article is for general informational and educational purposes only. It is not intended as, and should not be considered, legal, medical, or architectural advice. Water rights, greywater laws, and fire codes vary strictly by region. Always consult local officials before modifying plumbing or harvesting water.
Phase 1: The Efficiency Audit (Stop the Bleeding)
The leak hunt:
- Perform the 2-hour static meter test (turn off water, mark meter, wait).
- Use food coloring in the toilet tank. If it seeps to the bowl in 15 minutes, replace the flapper.
- Run each irrigation zone and look for geysers (broken heads) or wet spots (broken lines).
The hardware upgrade:
- Install 1.5 GPM (or lower) aerators on all bathroom faucets.
- Upgrade to high-efficiency showerheads (1.75 GPM).
- Install a shut-off valve behind the showerhead for instant pausing.
Phase 2: The Navy Protocol (Behavioral Changes)
Hygiene and sanitation:
- Adopt the Navy shower (get wet, water off, scrub, rinse).
- Place a bucket in the shower to catch warm-up water and use it to flush toilets.
- Adopt the mellow-yellow rule for selective flushing.
- Scrape dishes (do not rinse) and run the dishwasher only when full.
Phase 3: Landscape and Fire Defense (The Outdoor Shield)
Vegetation management:
- Apply 3 to 4 inches of wood mulch to garden beds to retain moisture.
- Remove all combustible mulch and plants within 5 feet of the house (Zone 0) and replace with gravel or pavers.
- Prune ladder fuels (low branches) to stop fire from climbing trees.
- Clean dry leaves from gutters and install 1/8-inch metal mesh over vents.
Foundation protection:
- Check the perimeter for gaps between soil and concrete.
- Install a soaker hose 18 inches from the foundation and run it weekly to maintain soil stability.
Phase 4: Water Security (Sources and Storage)
Alternative sources:
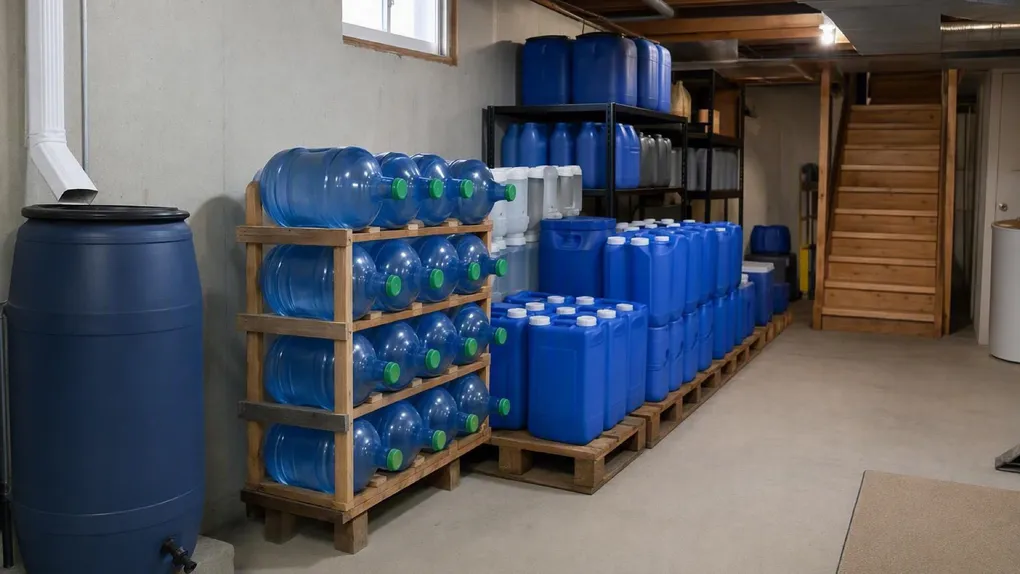
- Install a rain barrel with a mesh screen under a primary downspout.
- Switch to biocompatible laundry detergent and install a basic diverter if legal and feasible.
- Place a bucket under the AC drip line to harvest water for plants.
Emergency stockpile:
- Calculate 1 gallon per person per day for 14 days.
- Purchase rigid 5 to 7 gallon containers (jerry cans).
- Treat stored tap water with bleach (8 drops per gallon) or a commercial preserver.
- Place containers in a cool, dark place on pallets (not bare concrete).
The Final Task
- Print this page: digital files do not help when the power is out.
- Label the valves: tag your main water shut-off and gas shut-off with bright neon tags.
- Set a calendar reminder every 6 months to rotate stored water, change irrigation timer batteries, and redo the toilet dye test.
Next Steps
- Work the phases in order, one per weekend. The sequence is deliberate: leaks pay for everything else, and the storage tier is built last so it is sized correctly.
- Print this page and mark it physically. Pen beats app during a water advisory, for the same reason paper maps beat phones in the flood series.
- Read the Drought Preparedness Guide for the full series, where each phase here has a complete explainer.