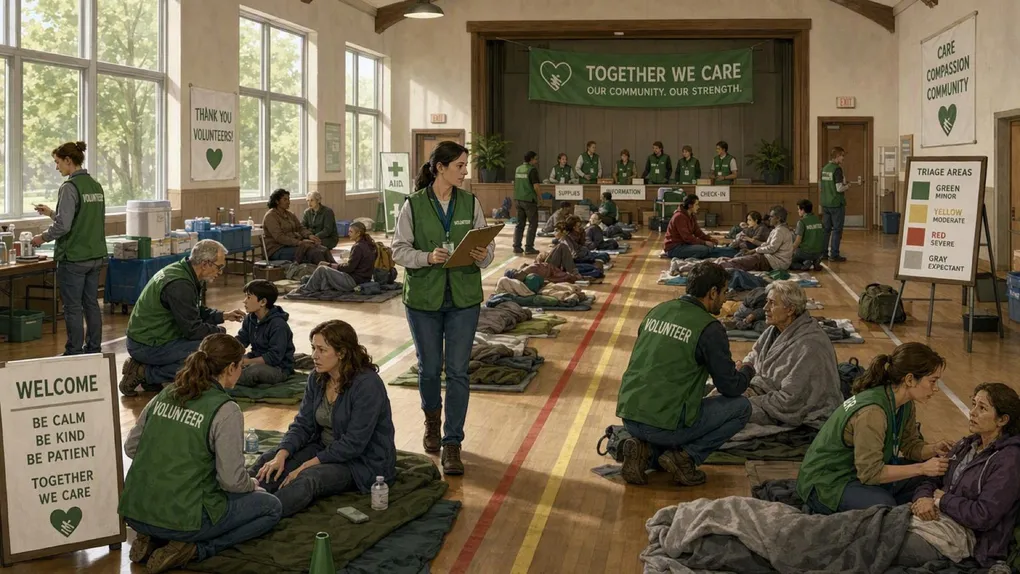
Disaster Medical Operations: Treatment Areas
When casualties outnumber rescuers, medicine becomes logistics. CERT Unit 4 covers the machinery of a mass casualty response: treatment areas that keep survivors sorted, head-to-toe assessments that find what triage missed, and the hygiene discipline that stops a disaster from becoming an epidemic. This post distills Unit 4.
Disclaimer: The information provided in this article is for general informational and educational purposes only. It is not medical advice and is not a substitute for formal training. Take a certified first aid course and follow emergency medical professionals.
The Readiness Audit
Could your neighborhood stand up a treatment area and run assessments tonight?
- Green: You know what DCAP-BTLS stands for, where a treatment area would go, and why a morgue area is separated.
- Yellow: You would improvise a clinic on someone’s lawn.
- Red: You did not know treatment areas were a thing.
If you are Yellow or Red, execute Phase 1 immediately.
Phase 1: Mass Casualty Incidents and Treatment Areas
Goal: Learn how a disaster clinic gets built.
Mass casualty incidents are incidents in which the number of casualties overwhelms local resources, from a commuter train derailment to a multi-car accident to a tornado. Injured survivors trigger treatment area setup by first responders, who may call on CERT volunteers to help establish the areas or supply needs. Decentralized treatment areas set up when damage, casualty numbers, and safety dictate: one medical treatment location a safe distance from (but not too far from) each damage site. Centralized treatment areas consolidate when there are few injured survivors at several sites. Both models share two hard rules: each location includes physically separated treatment areas and a morgue, and survivors remain under treatment there until first responders can transport them for professional medical care.
The Takeaway: The treatment area is the unit of disaster medicine, not the individual patient. Location, separation, and transport waiting are the design decisions.
Phase 2: The Head-to-Toe Assessment
Goal: Learn the search pattern for hidden injuries.
During an assessment, look for severe bleeding, low body temperature, and airway obstruction first. The head-to-toe assessment goes beyond immediate life threats to determine the nature of the patient’s injury, and the entire assessment is performed before initiating treatment, unless the patient requires immediate care to prevent serious injury or death. The medical community’s memory aid is DCAP-BTLS: Deformities, Contusions, Abrasions, Punctures, Burns, Tenderness, Lacerations, and Swelling, checked on all parts of the body. Assessments are conducted on all survivors, even those who seem all right, verbal if the patient can speak, and hands-on.
Consent is part of the drill: if the patient is conscious, always ask permission to conduct the assessment, and the patient has the right to refuse treatment. Talk with the conscious patient to reduce anxiety, wear PPE, and pay attention to the mechanism of injury, since how someone was hurt predicts what is hurt.
The Takeaway: Assess everything before treating anything, unless a life threat forces your hand first. The assessment’s job is to turn “he looks okay” into documented, specific findings.
Phase 3: Consent and Public Health
Goal: Handle people and hygiene correctly under stress.
Unit 4’s consent rules come from the responder safety pages: always ask permission to treat an individual, and if the individual is unconscious, care proceeds under implied consent. Ask a parent or guardian for permission to treat a child when possible. Respect cultural differences whenever possible. Sanitation and hygiene round out the unit as public health protection: in a disaster with broken water and sewage systems, the hygiene discipline of responders and survivors prevents the secondary outbreak that can hurt more people than the original event.
The Takeaway: The legal and hygiene rules exist for the same reason as the medical ones: a mass casualty scene that creates new patients (infections, disputes, disease) has failed.
The Essential Kit Checklist
- The Marking System: Tape or signs to separate treatment areas and the morgue area at a pre-planned site.
- The PPE: Gloves and eye protection worn for every assessment, no exceptions.
- The DCAP-BTLS Card: A printed assessment card in the kit so the search pattern survives stress.
- The Documentation: Forms to record injuries per patient for the professionals who take over transport.
- The Hygiene Kit: Soap, sanitizer, and gloves stock for the sanitation phase of the response.
Scenario Planner (Contingencies)
“The patient refuses treatment.” The trap: overriding a conscious person’s refusal because the injuries look serious. The fix: the manual is explicit that conscious patients must be asked and may refuse. Document the refusal and stay available.
“One big treatment area feels simpler than several.” The trap: a central site too far from the damage adds transport time to every intervention. The fix: the manual’s decentralized model exists for exactly that geography. Let damage severity, casualty count, and environment safety dictate the layout, and keep the morgue separated at every location.
Next Steps
- Re-run the Readiness Audit. Scroll back to the top, answer the three questions honestly, and close whichever gap they reveal before you close this tab.
- Print the checklist. The kit list above only works if it exists when the power is out, so paper beats apps here.
- Fold it into the family plan. A prepared household beats prepared person, so put these steps in front of everyone who shares your roof.
Next: Read Disaster Psychology for Volunteers for Unit 5’s guide to the mind after the disaster.
Adapted from FEMA - CERT Basic Training (public domain). Read the original: CERT Basic Training Participant Manual (2019).